
Go back to the table of contents for
Developing a Contact Management Application with Angular 1.5X and Java
At the end of this part, we will have a Spring Boot application relying on AngularJS for the front-end with the minimal configuration to develop the front end side.
In a first step, we will cope with the build of the Spring Boot application. Then, we will create a minimal angular application.
Here is the list of tasks we will perform :
- Setting up the parent pom for the actual requirement
- Source code layout
- Setting up the pom of the web application
- Configuring the bootstrap of the application in a Tomcat embedded server
- Setting some Spring Boot properties
- Creating a minimal AngularJs application and specifying Javascript and CSS dependencies we will use during the first iteration
- Running the Spring Boot application with the Spring Boot Maven plugin
- Downloading the source code
Setting up the parent pom for the actual requirement
As previously said, we will work in a iterative way. At this time, only the contact-webapp is required. We will introduce other modules only when we would need them.
<project xmlns="http://maven.apache.org/POM/4.0.0" xmlns:xsi="http://www.w3.org/2001/XMLSchema-instance" xsi:schemaLocation="http://maven.apache.org/POM/4.0.0 http://maven.apache.org/maven-v4_0_0.xsd"> <modelVersion>4.0.0</modelVersion> <groupId>davidhxxx.example.rest.springbootangular</groupId> <artifactId>contact-parent</artifactId> <packaging>pom</packaging> <version>1.0-SNAPSHOT</version> <name>${project.artifactId}</name> <properties> <maven.compiler.source>1.8</maven.compiler.source> <maven.compiler.target>1.8</maven.compiler.target> <project.build.sourceEncoding>UTF-8</project.build.sourceEncoding> <springboot.version>1.4.0.RELEASE</springboot.version> </properties> <modules> <module>contact-webapp</module> </modules> <dependencyManagement> <dependencies> <dependency> <groupId>org.springframework.boot</groupId> <artifactId>spring-boot-dependencies</artifactId> <version>${springboot.version}</version> <type>pom</type> <scope>import</scope> </dependency> </dependencies> </dependencyManagement> </project> |
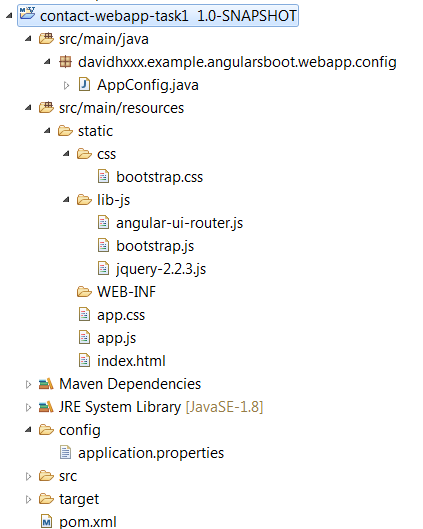
Source code layout
Setting up the pom of the web application
Let’s begin.
pom.xml
<?xml version="1.0" encoding="UTF-8"?> <project xmlns="http://maven.apache.org/POM/4.0.0" xmlns:xsi="http://www.w3.org/2001/XMLSchema-instance" xsi:schemaLocation="http://maven.apache.org/POM/4.0.0 http://maven.apache.org/xsd/maven-4.0.0.xsd"> <modelVersion>4.0.0</modelVersion> <artifactId>contact-webapp-task1</artifactId> <packaging>war</packaging> <parent> <groupId>davidhxxx.example.rest.springbootangular</groupId> <artifactId>contact-parent-task1</artifactId> <version>1.0-SNAPSHOT</version> </parent> <dependencies> <!-- Spring dependencies --> <dependency> <groupId>org.springframework.boot</groupId> <artifactId>spring-boot-starter-web</artifactId> </dependency> <dependency> <groupId>org.springframework.boot</groupId> <artifactId>spring-boot-actuator</artifactId> </dependency> </dependencies> <build> <plugins> <!-- ignore web.xml missing since not required --> <plugin> <artifactId>maven-war-plugin</artifactId> <version>3.0.0</version> <configuration> <failOnMissingWebXml>false</failOnMissingWebXml> </configuration> </plugin> <plugin> <groupId>org.springframework.boot</groupId> <artifactId>spring-boot-maven-plugin</artifactId> <version>${springboot.version}</version> </plugin> </plugins> </build> <profiles> <profile> <id>dev</id> <dependencies> <dependency> <groupId>org.springframework.boot</groupId> <artifactId>spring-boot-devtools</artifactId> </dependency> </dependencies> <build> <defaultGoal>clean spring-boot:run</defaultGoal> </build> </profile> </profiles> </project> |
In the build/plugins element of the pom, we define the spring-boot-maven-plugin. It is required as the Maven project has not the spring-boot-starter-parent artifact as parent.
With spring-boot-maven-plugin (it is true for the actual version 1.4 but as actually Spring Boot is rather unstable it might change in next versions), the static resources defined at dedicated places : src/main/resources/static and src/main/resources/public are not by default hot refreshed when they are modified. When you put inside it html, JavaScript or css files, you would like that the hot refresh be enable. In this way, from the browser you would need only to hit a refresh of the page.
You may configure the spring-boot-maven-plugin to enable the hot refreshing. In the configuration of the plugin you can add :
<addResources>true</addResources> |
By setting this parameter to true, any src/main/resources folder will be added to the application classpath when you run the application and any duplicate found in target/classes will be removed.
Unfortunately, enabling it has a serious side effect : Maven resources filtering at build time will not work.
Personally, I don’t find a acceptable solution as it creates an important constraint on the design of the application.
So I don’t enable addResources. But hot refresh of static resources being also a very important need, I make it working with my own way.
Hot refresh of static resources may for example be easily configured by using a tool that watches file modifications in the specified source folders and copy them in the target/classes folder when modifications occur.
At last to avoid write clean spring-boot:run at each time we want to start the application, I have created a Maven dev profile with as default goal clean spring-boot:run. The dev profile will grow during the development of the application.
For now, stay simple.
Configuring the bootstrap of the application in a Tomcat embedded server
Here is AppConfig that bootstraps and launches the application in the embedded Tomcat.
AppConfig
package davidhxxx.example.angularsboot.webapp.config; import org.springframework.boot.SpringApplication; import org.springframework.boot.autoconfigure.EnableAutoConfiguration; import org.springframework.boot.web.support.SpringBootServletInitializer; import org.springframework.context.annotation.Configuration; @Configuration @EnableAutoConfiguration public class AppConfig extends SpringBootServletInitializer { public static void main(String[] args) { SpringApplication.run(AppConfig.class, args); } } |
Setting some Spring Boot properties
We will set some Spring Boot properties for the application.
application.properties
This file defines default properties of the application. We could have other properties file and select one or the other one when we start a Spring Boot application.
When we will work on the back end side, we will see that.
Here is my used configuration :
server.port=8095
server.contextPath=/contact-webapp
logging.level.root=INFO
These values override predefined values provided by Spring Boot. Overriding them depend on your requirements. For a learning application in a local environment, we have no real constraint. So you can leave them or play with them, it doesn’t matter.
server.port specifies the port used by the embedded server. You have not necessarily to fill it. By default, server.port has as value 8080. Personally I specify my own value because I have sometimes multiple Spring Boot application deployed and they cannot use all the same port.
server.contextPath specifies the context path of the web application. By default, it is empty. So, the application is reachable from this url : http//localhost:8095.
By habit, I find more meaningful to have a explicit context path like that : http//localhost:8095/contact-webapp
It is here clearly a taste question.
Nothing prevents us to remove the context path in a Spring Boot production profile if we want that our application to be reachable from the root of the web server.
logging.level.root specifies the root level of the logging. By default, we want to give a average level of verbosity : INFO. But for some environments (in production for example) and for debugging purposes, we know that the INFO root level may be too verbose or not enough. We set a acceptable default value and we leave other application-XXX.properties files dedicated to XXX environment/build override this value as they need.
Creating a minimal AngularJS application and specifying JavaScript and CSS dependencies we will use during the first iteration
An AngularJS application works with a JavaScript side part and a html/dom part which hosts the application.
Here is the html page bound to the Angular application (ng-app) we are going to build :
<!DOCTYPE html> <html ng-app="myContactApp" > <head> <title>Contacts and Groups Management (Angular JS)</title> <style> </style> <!-- JQUERY --> <script src="lib-js/jquery-2.2.3.js"></script> <!-- bootstrap JS v3.3.6 --> <script src="lib-js/bootstrap.js"></script> <!-- bootstrap CSS v3.3.6 > --> <link rel="stylesheet" type="text/css" href="css/bootstrap.css"> <!-- angular lib --> <script src="https://ajax.googleapis.com/ajax/libs/angularjs/1.5.5/angular.js"></script> <script src="https://ajax.googleapis.com/ajax/libs/angularjs/1.5.5/angular-messages.js"></script> <script src="https://ajax.googleapis.com/ajax/libs/angularjs/1.5.5/angular-mocks.js"></script> <!-- angular-ui-router v1.0.0-alpha.4 --> <script src="lib-js/angular-ui-router.js"></script> <!-- app --> <link rel="stylesheet" type="text/css" href="app.css"> <script src="app.js"></script> </head> <body> <h2 class="text-center" ng-controller="myCtrl as ctrl">{{ctrl.msg}}</h2> </body> </html> |
We name this file : index.html. It is located directly in the src/main/resources/static folder of the web application project.
In index.html, we define all third party libraries (JavaScript and css) we will use and we also define our JavaScript file which contains the Angular code to start our Contact Application powered with Angular. In the index.html, several things deserve our attention.
- the
<html ng-app="myContactApp">declaration uses the ngApp directive to auto-bootstrap an AngularJS application. This directive designates the root element of the application and is typically placed near the root element of the page – e.g. on the <body> or <html> tags. - In the HTML head, the declaration order of JavaScript resources matters. When two scripts have a dependency between them, you have to declare first the used script and after the user script. That’s why, we have this order : JQuery, BootStrap, Angular, Angular-message, Angular-mocks, Angular-ui-routers and at last our Angular application which needs all previous mentioned scripts.
- The used version of third-party libraries matters in most of cases.
For example, Bootstrap JS 3.3.6 which requires JQuery is not compatible with all JQuery versions. In a same way, mixing different versions of core Angular libraries may be not working, etc…
So, if for a library you want to use a version different from which one I use, you should check before that it is compatible with dependent libraries. -
the
<h2 class="text-center" ng-controller="myCtrl as ctrl">{{ctrl.msg}}</h2>declaration doesn’t make many things. It is just a very simple code to check that the Angular application works.
Here is app.js :
(function() { 'use strict'; //IIFE angular.module('myContactApp',[]) .controller("myCtrl", function() { this.msg = "Hello contacts"; }); // END IIFE })(); |
In the app.js file, we initialize a Angular module called myContactApp (which is the value we have specified in the ng-app directive).
The code is extremely simple : we create a msg variable in the myCtrl controller scope and we assign to it the « Hello contacts » value.
In this way, <h2 class="text-center" ng-controller="myCtrl as ctrl">{{ctrl.msg}}</h2> renders Hello contacts.
In this example, we have not components yet. We will see them in the next part.
We can notice that the beginning and the end of the script contains some comments about IIFE. An IIFE is an immediately-invoked function expression. It is a technical you may use to reduce potential side-effects caused by global variables which makes part of the design of Javascript.
Concretely, it avoids variable hoisting from within blocks, protects against polluting the global environment. It helps to reduce variable collisions in the global scope.
When I use IIFE, I like to separate them with two break lines from the functional code in order to keep the code as a visual unity. That reduces at least visually a level of nesting. In the rest of the examples, the syntax could not be necessarily present but I would like to present it since it makes part of good practices in Javascript.
Running the Spring Boot application with the Spring Boot Maven plugin
From the shell, position the current directory to the level of the contact-parent project and execute the mvn clean install command, then go down in the contact-webapp project and execute the mvn -Pdev command.
The mvn -PDev is a shortcut provided by the Maven dev profile that we have added.
It avoids executing the verbose command :
mvn clean spring-boot:run -Pdev
-Dspring.profiles.active=dev
The embedded Tomcat starts and some seconds later we can see in the console something that indicates the application has started successfully:
d.e.a.webapp.config.AppConfig : Started AppConfig in 3.434 seconds (JVM running for 3.808) |
For now, you can note that the mvn clean install command from the parent project should be executed only the first time and when this project is modified. In other cases, you can directly execute mvn -Pdev from the contact-webapp project.
Now, go to the http://localhost:8095/contact-webapp/ url with your browser, you should see that :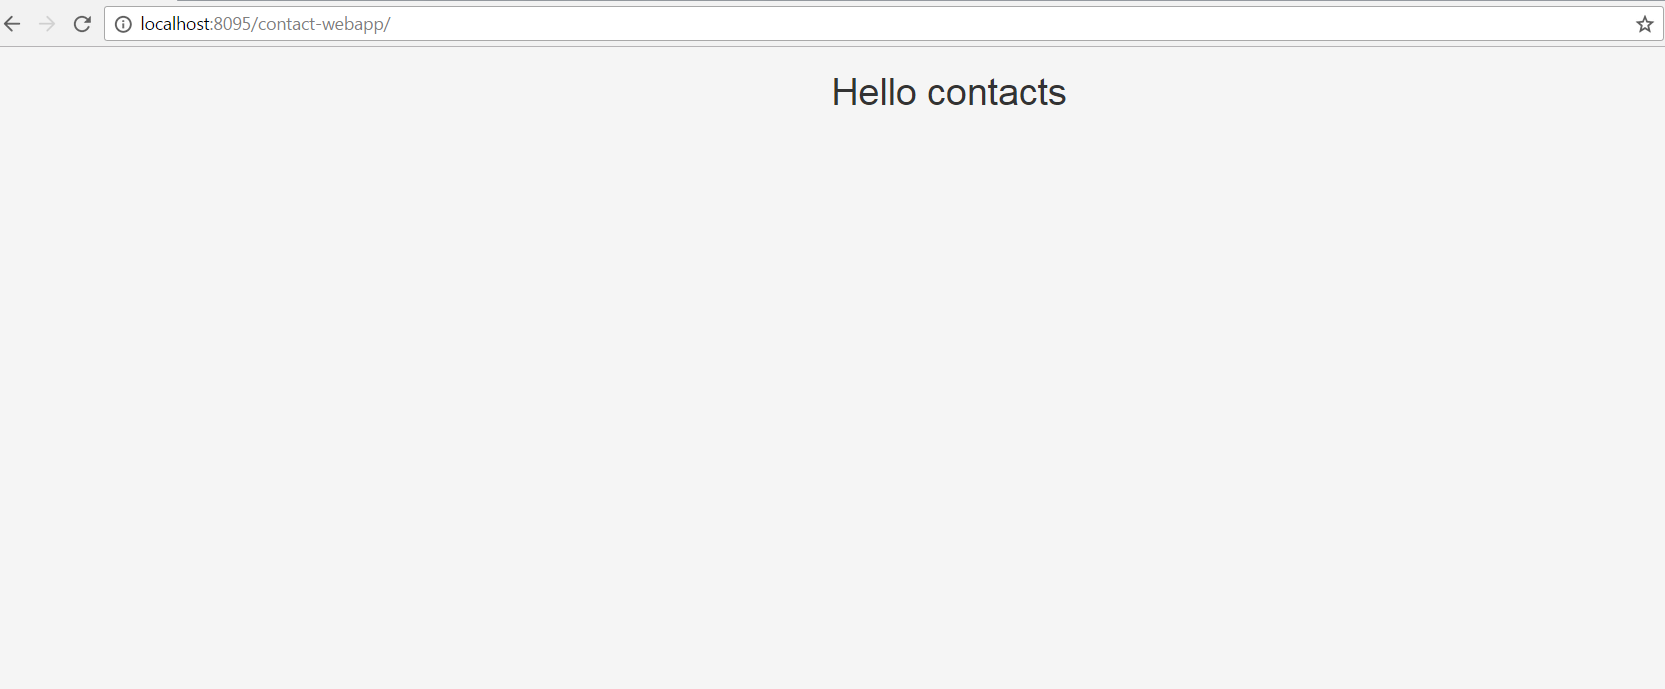
Downloading the source code
You can download the source code here : [sdm_download id= »2493″ fancy= »1″]
Next task : Defining the states of the application and adding a menu bar to access them (2/9)